


.jpeg)


.jpeg)


.jpeg)


.jpeg)


Timi A.
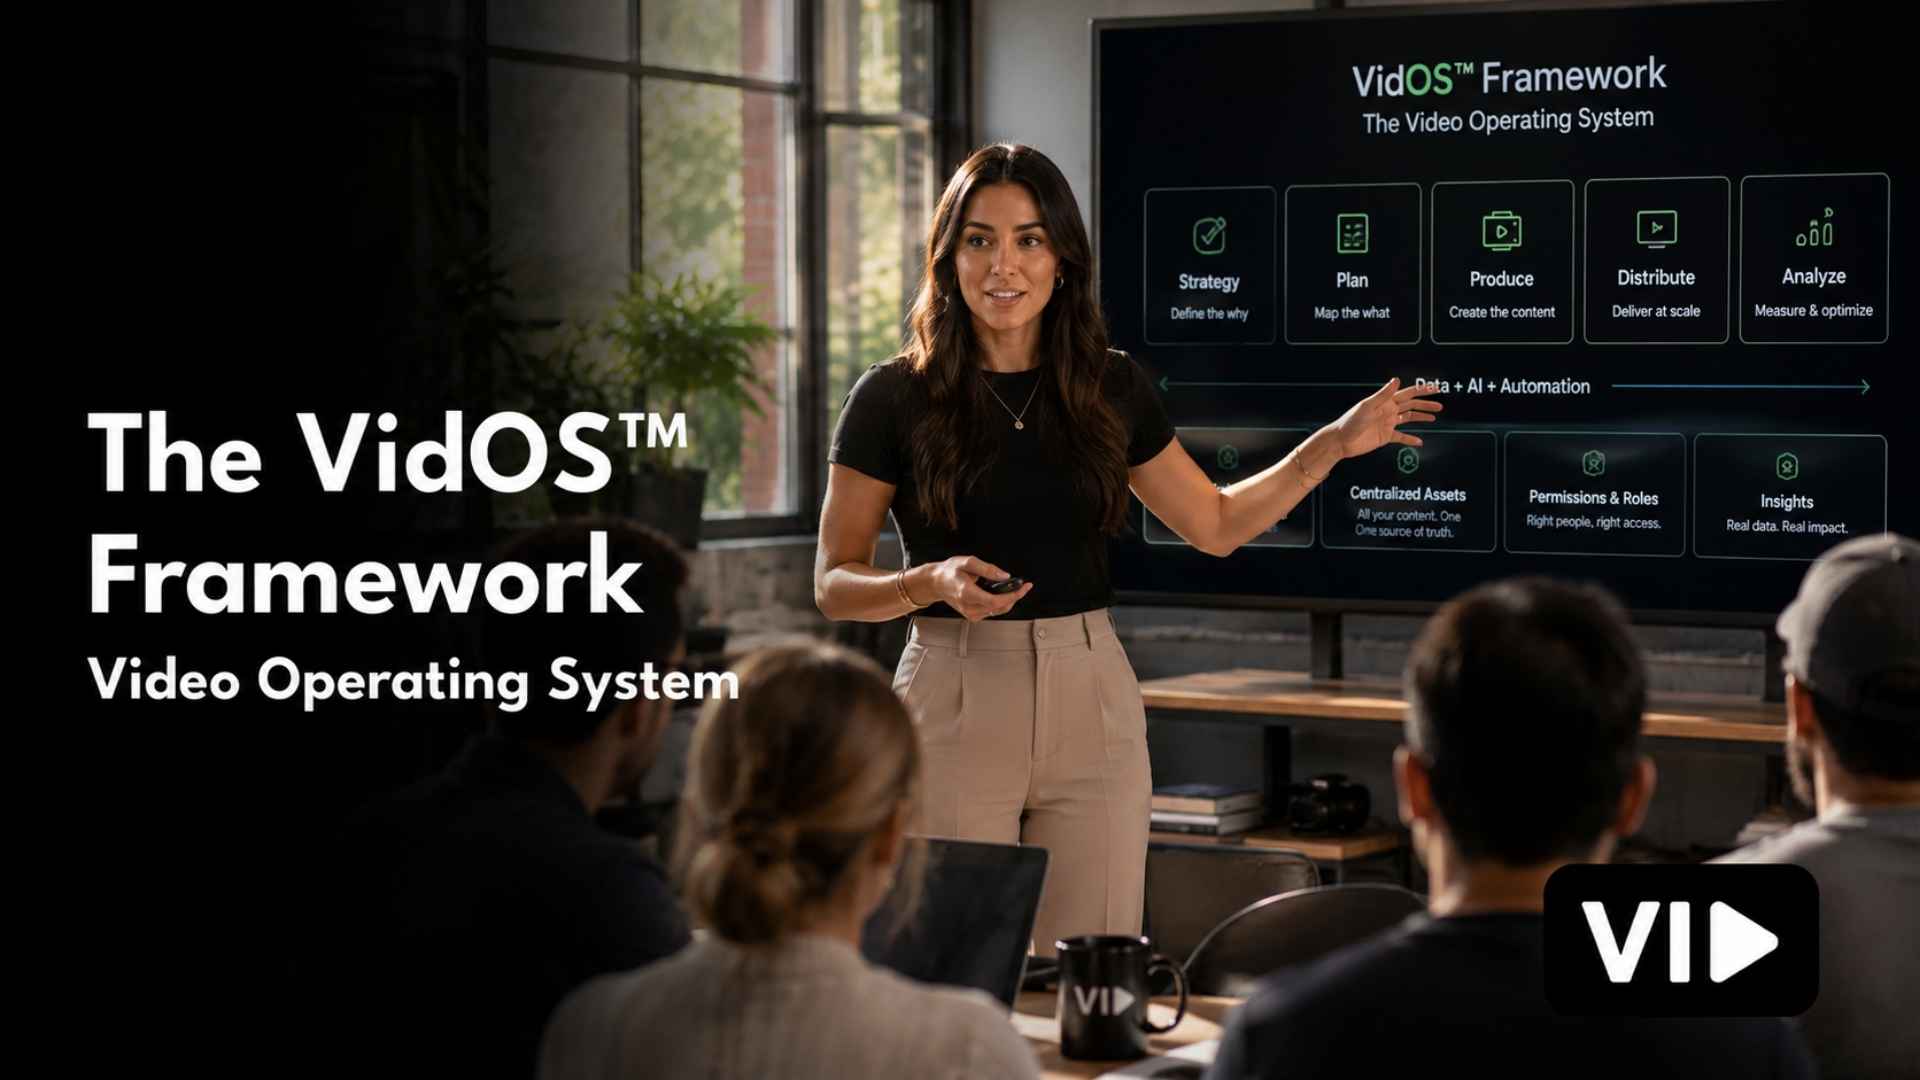
VID Guide
Your marketing team already knows it needs more video.
Let's make sure it actually gets produced. Tell us what your team is trying to grow, where production is getting stuck, and what you need to publish consistently. We will recommend the clearest next step—Sprint, Supply, or Install.
