


If you work in video production and marketing, you already know that pristine visuals can be the difference between an engaged viewer who sticks around and a frustrated one who bounces after five seconds. Yet “pristine” is a slippery adjective.
What looks fine on your calibrated studio monitor might crumble once a platform’s compression kicks in or a mobile user’s bandwidth drops. That is where objective quality metrics, especially VMAF, step in to translate subjective “looks good to me” into hard numbers you can trust.
Audiences are no longer patient with buffering, blocky gradients, or muddy motion. They binge-watch in 4K HDR on living-room TVs and then continue on a crowded subway using a phone that flips from Wi-Fi to LTE every few minutes. If the visual experience stutters, so does watch time, ad revenue, and brand perception. Relying only on eyeball reviews during post-production is not enough.
You need a metric that:
VMAF (Video Multimethod Assessment Fusion) is a perceptual quality model released by Netflix and later open-sourced. Rather than leaning on a single algorithm, VMAF fuses multiple assessment methods, detail preservation, color fidelity, motion consistency, and so on, into one composite score from 0 to 100. The goal is a number that correlates closely with how audiences judge video quality in the wild.
Netflix trained the model on thousands of human ratings, refining the weighting so that a VMAF drop of ten points roughly equals “viewers start to notice, complain, or churn.”
Under the hood, VMAF combines three established metrics, VIF (Visual Information Fidelity), DLM (Detail Loss Metric), and Motion Scores, through machine-learning regression. Each metric inspects a slightly different facet of the frame:
These individual scores feed a trained model that outputs the final VMAF number. Because the algorithm compares an encoded sample to its pristine source, you get an objective gap between “what you shot” and “what the audience receives.”
A common rookie mistake is treating VMAF like a video game high score, “I must reach 100!” Realistically, anything above 95 is visually transparent for most consumers. Instead of chasing perfection, align the score with delivery goals and bit-budget.
Remember: Context matters. A dramatic short film may deserve a 93 VMAF master, while a quick B-roll montage for TikTok can live comfortably at 82 without harming engagement.
Adopting VMAF is less daunting than it sounds. The toolkit is open source, command-line friendly, and compatible with FFmpeg. A typical pass looks like this:
The upshot is fewer guess-and-check rounds and more data-driven confidence when a client demands, “Make the file smaller, but don’t let it look worse.”
Brands using adaptive streaming report clear efficiency gains after weaving VMAF into their encoding decision trees. One sports network trimmed 30 % off average bitrates, saving millions in CDN fees, while keeping VMAF above 92 for flagship events.
A fitness-app studio discovered most users watched on phones, so it safely lowered 1080p bitrates to 4 Mbps once VMAF proved quality held at 91. Case studies like these show that the metric isn’t academic; it directly impacts budgets and brand reputation.
No metric is a silver bullet. VMAF currently assumes the reference source is perfect, so it cannot warn you about problems baked into the master (for instance, noise or banding from camera settings).
HDR workflows present additional wrinkles because human perception of brightness isn’t linear. Dolby and Netflix have released HDR-VMAF profiles, but always pair them with hand-eyed reviews, especially for high-nit highlight rolls.
Keep a sanity checklist alongside VMAF:
Ultimately, VMAF shines brightest when embraced by the entire video production and marketing chain, from cinematographers who capture clean source footage, to editors who avoid unnecessary re-renders, to encoding engineers who fine-tune ladders, and finally to marketing leads who need proof that the content will look superb on any platform.
Turning quality from a gut feel into a measurable KPI unites departments that once spoke different dialects, swapping the vague “Looks kind of soft?” for “We slipped from 92 to 87 VMAF after adding graphics; let’s revisit the alpha channel settings.”
Quality is no longer an abstract aspiration. With VMAF in your toolkit, you can measure, optimize, and brag with data to back it up. That confidence frees your creative team to push boundaries, secure in the knowledge that the story you crafted lands on viewers’ screens exactly the way you imagined.

There’s no shortage of content online, but there is a shortage of content that actually works. The brands that stand out know exactly how to capture attention and generate a loyal fan base. But they’re not all out there creating expensive content produced in a studio. Most of them are leveraging user-generated content (UGC) and mixing it into studio-quality clips for maximum impact. Whether you’re designing ad campaigns, building landing pages, or just showcasing testimonials, knowing which format to use is the key to getting results.
Knowing when to use UGC compared to polished content produced in a studio can mean the difference between a marketing campaign that feels relatable and one that feels too corporate. The truth is, you can’t just stick with one or the other. Balancing authenticity with polish is the best move. But not every situation calls for a blend, and sometimes the ratio of UGC to polished content matters. Here’s what you need to know to make video content work for your brand.
Let’s start with the basics. User-generated content is typically raw, authentic content created by everyday people using phones or consumer video equipment. Studio-quality content is high-quality, professionally filmed media created with precision, controlled lighting, scripts, and editing.
UGC builds trust because it looks like something a normal person would post to their own blog. Many studies have shown that people are far more likely to trust UGC over polished, branded content. According to data sourced by Get Roster, consumers find UGC 9.8x more impactful than influencer content when making a purchase decision. Put simply, people don’t like feeling like they’re being sold to by corporations; UGC feels more like you’re connecting with a friend.
Some examples of UGC content include:
· Written content. This includes customer reviews, comments, and testimonials.
· Visual content: This includes static images, memes, product photos often posted with testimonials, and graphics.
· Multimedia content: This includes reviews, testimonials, tutorials, unboxing videos, and anything else users publish in video or audio format.
User-generated content is most likely to be found on social media platforms, company product pages, in emails, and in various places online.
Although users trust UGC more, studio content isn’t bad. It still serves a purpose and should be incorporated into your video marketing strategy. While UGC grabs attention, studio content is where you fine-tune your message, create visual consistency for your brand, and create a clean, clear, persuasive final video.
Both types of content have value, but they serve different purposes depending on your goals and where your content will be published.
When it comes to video ads, UGC often outperforms traditional corporate ads, especially on TikTok and Instagram where authenticity is expected. When you use user-generated content for ads, your video blends seamlessly into feeds, which generates more engagement and longer watch times. If you’re looking for ways to increase your return on ad spend (ROAS), UGC content is it.
If you need to film a product walkthrough or provide in-depth visual explanations, studio content wins. This is especially true for high-ticket items or complicated offers.
When mixing these two types of content, use UGC to spark curiosity and studio content to drive conversions. This is a winning combination. In fact, according to research by Power Reviews, conversions increase by 8.5% when visitors are served some form of UGC on product pages.
Before you can determine whether to use UGC or studio-polished content, it’s important to understand how each type of content impacts users in different contexts. Whether it’s your homepage, an ad on social media, a landing page, or a testimonial makes a huge difference. Here’s a breakdown of what content works best in different locations:
Your website is a digital storefront, and visitors will judge your credibility in seconds. That’s why the smartest brands use both UGC and studio-produced video assets strategically.
UGC is powerful for building trust. Embedding real customer videos, unscripted testimonials, and reviews humanizes your site and reinforces social proof. Showcasing authentic voices from happy customers demonstrates real-world satisfaction and makes your offer more relatable.
But while UGC grabs attention and builds trust, it doesn’t always tell your story the way you need it told. That’s where studio content shines. Professionally shot product demos, animated explainer videos, and brand overview clips ensure message clarity, reinforce your brand’s visual identity, and help guide visitors deeper into your funnel.
Landing pages benefit the most from this blend. UGC warms up the visitor while studio content seals the deal. Position UGC near your CTAs, testimonials, and FAQ sections to answer objections and boost engagement. Then, support those emotional cues with polished content that showcases features, benefits, and value in a way that feels trustworthy. In other words, UGC earns the click and attention, but studio quality earns the confidence that converts.
In short:
· UGC builds an emotional connection
· Studio content delivers clarity and persuasion
· Together, they build the credibility that turns your website into a conversion machine
So, instead of just showing off your product, show real people loving it and then explain why they love it with authority.
Unsolicited customer testimonials are one of the most powerful forms of content you can publish, and the best ones are honest and raw. However, they work even better when blended into a studio-edited video.
To create a powerful video leveraging testimonials, start with the raw material. A selfie-style video recorded by a real customer, in their own words, can deliver sincerity you can’t achieve with a scripted video. Viewers can sense when someone genuinely believes in a product and that authenticity is gold. People trust online reviews as much as personal recommendations.
But you can’t just drop unedited clips into your brand campaign. UGC testimonials often have poor lighting, background noise, and off-topic rambling. That’s where studio editing can elevate the entire experience. You can trim the fat, sharpen the message, and layer in supporting visuals like product b-roll, graphics, and subtitles.
This approach will preserve the authenticity of the testimonial while reinforcing your brand’s authority and polish. Your content will be honest while looking great.
Here’s what that might look like:
· A customer records a minute-long video raving about your services.
· You edit the clip into a 2-minute branded testimonial reel.
· You overlay the UGC with studio-shot b-roll of your team in action, the product in use, and callout graphics showing stats or key phrases.
Now you’ve got a testimonial asset that works across multiple channels, including your website, paid ads, and as part of your email nurturing sequence. And because the voice is real, it doesn’t trigger the “this feels like an ad, let’s ignore it” aversion filter most users have developed.
When you’re running awareness campaigns, your number one job is to interrupt the scroll. People aren’t actively looking for your product yet, so you have to meet them where they are with engaging content that feels natural and worth watching. This is where UGC will be your hero.
Raw, relatable, and informal UGC is far more likely to break through the noise of polished, corporate as in a feed. Whether it’s a TikTok review, an unboxing video, or a customer showing off results, this type of content often gets more engagement, more shares, and more watch time than traditional ads.
People who are just getting into your funnel don’t want a sales pitch; they want a story. They want proof that people like them are solving problems or discovering cool things. UGC fits perfectly.
But once you’ve captured attention with UGC, you have to do something with it. That’s where studio-produced content comes into play. It helps you define your brand, shape the narrative, and elevate perception. Once your audience is primed and paying attention, studio content can be used to reinforce your values, product promise, and unique value proposition.
For example:
· Lead with a UGC clip in your paid ad that says something like, “I didn’t think this would work, but wow.”
· Follow it up with a studio-polished segment showcasing your product in action with crisp visuals, emotional music, and a clear message.
· End with a strong CTA and your branding front and center.
The sequence of UGC to hook, studio to shape is a proven successful combo. Pairing authentic UGC-style hooks with studio-finished content in the same ad can increase watch-through rates and increase overall conversions significantly.
Generating awareness requires being seen and remembered. Use UGC to get in the door and use studio content to show your prospects why you deserve to stay.
Once users are in the middle of your funnel or being retargeted, presentation starts to matter more. When your audience has moved beyond casual awareness and is weighing their options, the content you serve needs to shift gears.
Studio-quality content will guide buying decisions by providing clear messaging that helps users understand features, pricing, and benefits. At the same time, UGC lowers the barrier to conversions. Real people showing their results increases confidence and removes objections. Together, both types of content tackle logic and emotion.
When you only focus on studio content you miss out on closing sales. Logic alone won’t close deals – emotion is the driving factor. UGC provides the validation people need to feel emotionally connected and convinced that your product is for them. It lowers the risk and answers the unspoken question, “but will this work for me?”
Map content type to where a customer is in their journey. For example:
· TOFU (top of funnel): UGC ads, influencer clips, casual TikTok videos
· MOFU (middle of funnel): Studio testimonials, product pages with UGC
· BOFU (bottom of funnel): Studio demos, retargeting ads, email videos
When determining what content to use, it’s not just about either/or – it’s about when and where.
On social platforms like Facebook, Instagram, and TikTok, UGC is more cost-effective and gets more engagement. Many brands have found that UGC outperforms studio content by nearly 30% in terms of engagement and provides a 20% higher ROAS over traditional ads.
Studio content wins in the realm of retargeting to establish trust as users see your brand more frequently. When retargeting, your ads should rotate both formats to reduce ad fatigue.
You can combine both types of content in a hybrid ad. For instance, embed a customer’s 10-second testimonial inside a high-production testimonial ad or shoot your own UGC-style content in a studio for the best of both worlds. When done right, a hybrid ad can outperform either type on its own.
Influencer content is basically UGC content, but not always low-quality. Micro-influencers tend to produce UGC-style content because it’s cost-effective and generates high engagement. However, top-tier influencers need studio polish because their audience expects brand control and message precision.
When choosing between influencer types, most small businesses find micro-influencers to be more effective. Since they have a smaller fan base they get better engagement rates and that means more conversions. However, if you have the budget for a bigger influencer, don’t skip it. Both can be valuable partnerships.
Measuring the ROI of your content through analytics is crucial. Measure the results of UGC and studio content differently because they behave differently. You’ll need to analyze performance based on where the content is placed. UGC excels in click-through rates (CTR) and engagement, while studio content excels in views and conversions. One exception is TikTok. Many people have found that TikTok ads convert better when the videos look like native content.
In any case, you’ll want to run split tests for your ads to see what combinations of UGC and studio content work best. It’s also crucial to test by platform. What works great on TikTok might flop on YouTube. Don’t take failure as a sign that the ad itself is ineffective until you’ve tested it on other platforms.
While both content types are valuable, there are a couple errors to avoid:
· Relying too much on UGC for complex products. Some things are better explained with polish.
· Expecting studio content to outperform everywhere. Just because you paid a lot to have a video produced doesn’t mean it’s going to be well-received on all platforms.
Polished content often gets ignored in social feeds when people expect rawness.
Use each content format for what they do best, not just what’s easiest.
At Vid.co, we craft campaigns that balance authentic UGC with studio-level quality and clarity. From TikTok-ready scroll-stoppers to polished landing page videos, we build content ecosystems that work. Reach out today and let’s create amazing content that delivers real results.

Scrolling through a social feed, a viewer taps on your live event. Two seconds later the image stutters, the audio falls out of sync, and—before your brand has even delivered a message—the viewer has swiped away. In the crowded arena of video production and marketing, that single moment may be the only shot you get at converting a casual scroller into a follower or customer.
More often than not, the culprit behind the dropout is a memory-related bottleneck on the user’s device, a phenomenon many engineers call “memory tanks.” Multi bitrate (MBR) encoding can spare your stream from this fate, helping you reach audiences on shaky café Wi-Fi as reliably as viewers on fiber-optic broadband.
Every connected device—laptop, phone, set-top box—allocates a finite slab of RAM to video playback. When the incoming data rate outruns this buffer, the tank “overflows.” The media player seizes resources to catch up, frames vanish, and the viewer experiences the heartbreak of buffering wheels.
The effect is magnified on low-spec phones, overloaded browsers with dozens of open tabs, or viewers roaming between cell towers. Even if you are pushing a crystal-clear 4K image, none of it matters if the stream chokes on arrival.
Multi bitrate encoding is less about raw horsepower and more about giving each viewer a tailored lane on the highway. Instead of creating one heavyweight file, you encode several renditions of the same video at different resolutions and bitrates—say 1080p at 6 Mbps, 720p at 3 Mbps, 480p at 1 Mbps, and so on.
A streaming protocol such as HLS or DASH delivers a manifest pointing to all versions. The player tests the viewer’s connection every few seconds and hops up or down a rung when conditions change. The result is a graceful degradation: the image may downshift from Full HD to SD for a moment, but it keeps playing and your message stays on screen.
A dropped frame is more than a technical glitch—it is a lost impression, a broken piece of storytelling, or a sale that never happened. For agencies and in-house teams juggling schedules, budgets, and stakeholder expectations, MBR encoding offers three tangible wins:
Record or edit a clean master file—generally ProRes, DNx, or a high-bitrate H.264/H.265 export—to protect fine detail and color accuracy.
HandBrake, FFmpeg, Media Encoder, and cloud platforms such as AWS Elemental or Bitmovin all support MBR workflows. Your decision will hinge on budget, automation needs, and team skill sets.
A common baseline is four to six rungs, each roughly half the bitrate of the step above it. For global campaigns, add a sub-400 kbps rendition to accommodate 3G users.
Wrap the renditions in HLS (preferred for iOS, popular on the web) or DASH (widely supported on smart TVs and Android).
Cloudfront, Akamai, Fastly, or specialized video platforms cache your segments close to the end user and shave precious milliseconds off delivery.
Emulators lie; a five-year-old Android phone on hotel Wi-Fi never does. Collect data on buffering, bitrate switching frequency, and overall stability.
A flawless stream is rarely about brute-force resolution or the latest, greatest camera. It is about respecting the technical limits of the viewer’s hardware and network in the service of clear storytelling. By folding multi bitrate encoding into your post-production pipeline, you insulate your campaigns against memory tanks and buffering spirals.
That, in turn, keeps audiences engaged, algorithms friendly, and your video production and marketing efforts firing on all cylinders.
In video production and marketing, every link in the streaming chain affects how viewers perceive your brand and whether they stick around long enough to convert. The camera work may be flawless, the edit slick, the messaging spot-on—yet a single technical hiccup between the edit suite and the viewer’s screen can undo all that effort.
One of the most overlooked (and therefore most dangerous) choke points is transmuxing: repackaging audio-video streams from one container to another without re-encoding. Because the original bits stay intact, teams often assume transmuxing is “set it and forget it.” That complacency can cost you viewers, ad impressions, and revenue. Here’s why you should keep a vigilant eye on the process, plus practical tips for doing it right.
Before diving into the “hawk-eyed” monitoring mindset, it’s worth clarifying what transmuxing actually is (not to dissimilar from video transcoding). When you shoot or export a finished video, you generally end up with an MP4 (or MOV) file that wraps H.264 or H.265 video and AAC audio. Streaming platforms such as HLS, DASH, or CMAF, however, prefer segment-based containers—MPEG-TS for HLS, fragmented MP4 for CMAF, and so on.
Transmuxing takes the encoded streams and slips them into a new wrapper, slice by slice, without altering the compression layer itself. In theory, that means zero quality loss and minimal CPU overhead. In practice, packaging errors, timing mismatches, or manifest glitches can creep in and quietly sabotage the final viewer experience.
Think of transmuxing as the baggage-handling system at an airport. The luggage (your video streams) might leave the plane intact, but if the conveyor belts jam or tags get swapped, travelers will be fuming at the carousel. The same goes for viewers and clients when transmuxing misbehaves. Here are the key stakes:
The video looks crisp, but the dialogue suddenly lags half a second behind lip movement. Because the encoded frames are unchanged, engineers often chase phantom encoding bugs instead of the real culprit: inconsistent PTS/DTS time stamps introduced during segment cutting.
Live commerce events and esports tournaments routinely target sub-five-second latency. Yet a poorly tuned transmuxer can accumulate extra buffers, pushing delay into the 10-to-15-second range. Viewers notice when chat reactions arrive long before the on-screen action.
Even though transmuxing avoids re-compression, it can trigger standby workflows that “fall back” to software encoders when the packager hiccups. The stream silently shifts from a pristine ladder of bitrates to a murky emergency encode. If no one is watching metrics in real time, that lower quality can run for hours unnoticed.
Mistimed IDR markers or truncated segments can break beacons used for server-side ad insertion or viewer analytics. Marketing teams then scratch their heads over missing completion rates, not realizing the packaging layer clipped the very cues they rely on.
The point of obsessing over transmuxing isn’t merely technical perfection—it’s measurable business impact. Shorter start times raise view-through rates; smoother playback boosts watch-time, which in turn lifts algorithmic recommendations and ad fill percentages. For e-commerce streams, shaving even two seconds off latency can sync chat-based Flash sales with on-screen demos, nudging impulse buys upward.
When a brand’s video production and marketing strategy hinges on live Q&A or shoppable overlays, the packaging layer becomes part of the revenue engine, not a behind-the-scenes footnote.
All the cinematography, copywriting, and promotion in the world can crumble if the final hand-off from encoder to viewer falters. Transmuxing may look like a simple container swap, but its ripples touch quality of service, analytics accuracy, and ultimately conversion rates. Treat it with the same scrutiny you reserve for editing timelines or A/B testing ad creatives.
Watch transmuxing like a hawk, and your audience will never see the glitches you prevented—only the seamless, engaging experience you promised.

If you spend your days (and too many late nights) immersed in video production and marketing, you’ve probably cursed at least once about a file that refused to render, a timeline that stalled, or a YouTube upload that looked as if it were filmed through frosted glass. Nine times out of ten, the villains behind that frustration are the same two culprits: keyframes and GOPs.
They sit at the very heart of modern video compression, and misunderstanding them is a fast track to your own personal encoding inferno. Before we show you the map out of Dante’s data dungeon, let’s unpack what these terms really mean.
In simple terms, a keyframe sometimes called an I-frame, is a self-contained image inside a video stream. Think of it as a full photograph: every pixel is stored, nobody relies on any other frame to know what belongs where. Your playback software can jump straight to a keyframe and display that point in time instantly.
Without enough of them, scrubbing through footage feels like wading through molasses; too many of them, and your file size balloons faster than an over-inflated party balloon. Balancing keyframe frequency is the first circle of encoding hell, where the sin of excess or scarcity is punished by either file bloat or sluggish editing.
A GOP (Group Of Pictures) is the pattern of frames between two keyframes. It usually contains:
In essence, a GOP is a well-ordered family reunion of frames that collectively save space by sharing information. The longer the GOP, the more compression you get, but the harder it is to seek, trim, or cue. Shorten it, and you gain editing agility but at the cost of larger files and higher bit-rates. This is where many editors find themselves stuck in the second circle: wrestling with GOP length until they feel every tweak is a new torment.
Much like Dante’s tour of the underworld, working with keyframes and GOPs introduces a hierarchy of ordeals. Below is a tour of the most common traps, plus the sins that landed us there.
Laugh or cry at how many of those circles you’ve visited, the point is clear: keyframes and GOPs dictate everything from editing responsiveness to final distribution quality.
You don’t need a flaming sword, just a solid plan. Below are practical habits that pull countless editors, marketers, and motion-graphics artists back into the light.
Before cameras roll, ask where the video will live. A 30-second Instagram Reel can tolerate shorter GOPs and more keyframes because algorithms chop it into bite-size chunks anyway. A two-hour live webinar destined for on-demand viewing benefits from longer GOPs but demands frequent IDR (Instantaneous Decoder Refresh) frames so viewers can seek effortlessly. Reverse-engineer your codec settings from the distribution platform’s spec sheet instead of forcing one preset to rule them all.
Editing long-GOP footage feels smooth… until you layer color correction, subtitles, and tracking data. Create lightweight proxies with all-I-frame codecs (like ProRes Proxy or DNxHR LB) for the offline edit. Reserve your long-GOP compression (H.264/H.265) for final delivery. Yes, it takes extra disk space up front, but you’ll avoid the fourth circle’s replay of timeline stuttering.
A predictable interval, say, one keyframe every two seconds for 30 fps content, keeps file size modest and enables quick cueing. Random or automatic modes can scatter keyframes based on scene complexity, but those algorithms occasionally misfire, front-loading hundreds of KB into a single second. Manually locking the interval provides sanity and consistent seek behavior across multiple platforms.
More keyframes generally require higher bit-rates. If you must boost the I-frame frequency for fast-paced sports edits, compensate by slightly lowering the overall bit-rate or adopting a more efficient codec (H.265 or AV1). Conversely, if you squeeze the GOP length to squeeze file size, bump the bit-rate to prevent macro-blocking during high-motion shots.
Every post house keeps a “golden bible” of codecs, frame rates, color spaces, and bit-rates that work for their target outlets. Add keyframe interval and GOP pattern to that cheat sheet. When you revisit a project six months later or hand it to a freelancer, nobody winds up in a fresh circle of hell searching for the right dropdown menu.
Keyframes and GOPs sound like dry textbook terms, yet they sit at the crossroads where creative storytelling meets ruthless math. Handle them badly and you spend half your budget on revisions or, worse, watch your pristine 4K commercial crumble into a pixelated mess on a client’s laptop. Handle them well and you’ll breeze through post-production, hit every social platform’s requirements, and let audiences focus on your message rather than on buffering wheels.
At its core, video production and marketing is about persuading an audience. Smooth playback, quick scrubbing, and small file sizes aren’t luxuries; they’re prerequisites for keeping eyeballs glued to your campaign. By mastering the dark arts of keyframes and GOPs, you transform them from circles of torment into stepping-stones toward sharper, faster, more watchable content. And that, unlike Dante’s journey, is a path that ends not in despair, but in triumphant applause, higher click-through rates, and a video team that still has its sanity intact.
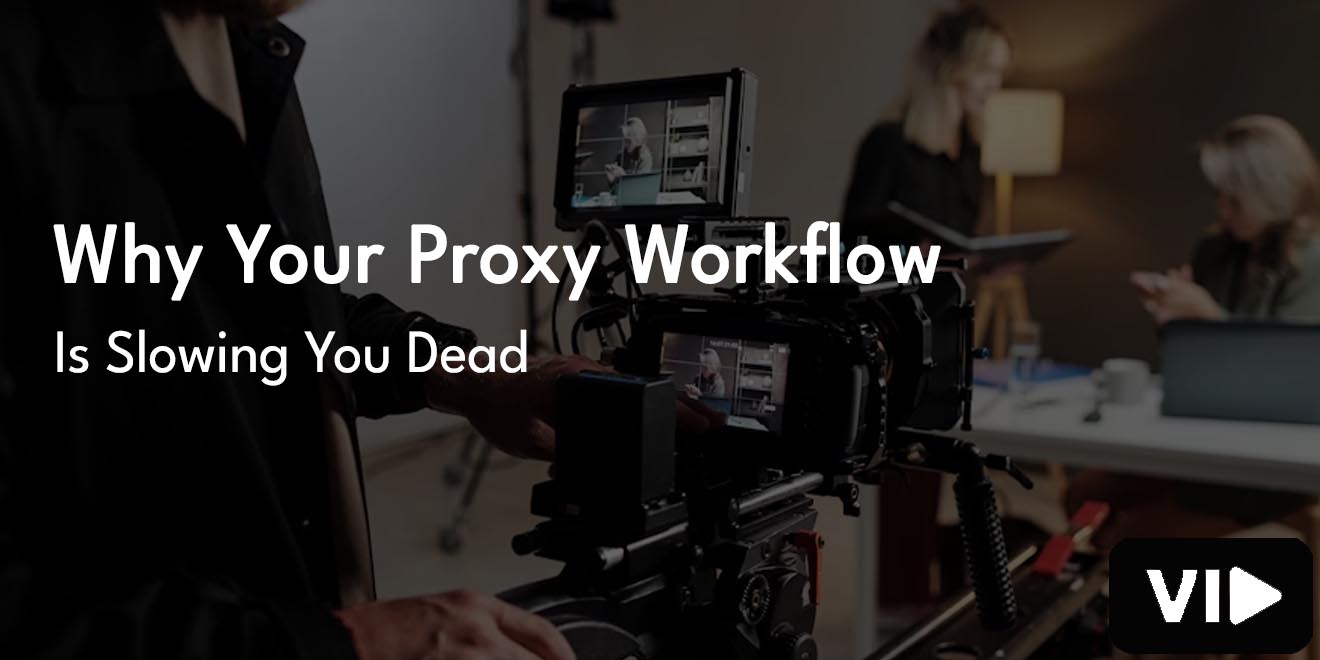
Anyone who spends their days deep in video production and marketing knows the promise of a proxy workflow: lighter files, smoother scrubbing, fewer coffee-break render bars. In theory, proxies let you edit a 6K commercial on a laptop without the fan screaming for mercy. In practice, though, a proxy-heavy timeline can feel like driving a sports car with the parking brake half-pulled.
If your edits crawl, exports stall, or clients wonder why the “rough cut” is weeks late, your proxy pipeline may be to blame. Below you’ll find the most common choke points and how to clear them.
A proxy file is a low-resolution, low-bit-rate duplicate of your original footage. You toggle between proxies for real-time editing and full-res media for color grading, VFX, and final export. Done right, this switch is seamless. Done wrong, you spend more time relinking, re-rendering, and guessing which clip is which than actually shaping the story.
Some editors crank out proxies using whatever preset pops up first. If the codec adds a funky color space or a non-standard frame size, you’ll fight gamma shifts and black bars later. Worse, proxies that are too compressed still bog down with GPU effects applied. The “weight loss” never happened.
Raw footage on one drive, proxies on another, exports on the desktop: the NLE spends half its life searching for media. Every time you reopen a project, you stare at offline tiles until you manually point the program in the right direction. Multiply that by ten projects and the hours disappear.
In theory you relink once—switching from proxy to full-res for final grade—and call it a day. In reality, mixed frame rates, sync-sound WAVs, and nested sequences confuse the software. You think you’re grading full quality, but you’re actually looking at proxies, or vice versa, and nothing matches on delivery. Now you’re re-exporting at 3 a.m.
Colorist in DaVinci, motion graphics in After Effects, audio in Fairlight: a modern campaign hops apps more than a festival DJ. Every jump can break proxy links and force a full conform. If your XML or AAF can’t find the right files, you’ll re-encode or—worse—re-edit just to keep moving.
If two or more of these ring true, your proxy shortcut has officially become a detour.
ProRes Proxy, DNxHR LB, or even H.264 with intraframe compression strike the right balance: light enough for laptops, faithful enough for color later. Stay away from oddball frame sizes—keep proxies pixel-perfect multiples of the source so software scales on the fly without math headaches.
Adopt a rock-solid folder structure—“Project > Footage > Day 01 > A-Cam,” then “Project > Proxies > Day 01 > A-Cam”—and never break it. When you copy to a new drive, mirror the hierarchy exactly. A predictable path means the NLE can auto-relink instead of forcing guesswork.
Premiere’s ingest presets, Resolve’s Proxy Generator, or cloud farm scripts can batch-encode overnight. Automation lets you wake to a stack of ready-to-cut files instead of babysitting Media Encoder. By finishing proxies before you ever touch the timeline, you eliminate mid-project re-renders.
Before defaulting to proxies, test your machine on smart-encoded originals: ProRes, AVC-Intra, or BRAW often play smoothly with a modern GPU. If your rig handles full-res until heavy grading, skip proxies until the final stage. Fewer files equal fewer headaches.
For these scenarios, the proxy overhead outweighs any speed benefit. Direct-to-source keeps the pipeline lean.
Proxies are a powerful tool, not a mandatory religion. If your workflow feels stuck in first gear, don’t blame the footage size; scrutinize how, when, and why those smaller files are created. By choosing sensible codecs, maintaining bulletproof folder paths, and automating the grunt work, you’ll spend less time wrangling media and more time shaping stories that move the needle in video production and marketing. In other words, cut the drag, ship the spot, and get back to doing the creative work you actually enjoy.

.svg)

.png)

.png)

.png)